Tool Windows
Tool windows are a special-purpose windows that are always visible to the user (unless they are hidden) and always ready to perform a task. The following Device Monitoring Studio features and functions are implemented as tool windows:
- Devices Tool Window
- Sessions Tool Window
- USB Device Descriptor
- USB Configuration Descriptor
- USB HID Descriptor
- USB Dependent Devices
- Serial Device Information
- Packet Builder
- MODBUS Send
Location
A tool window either may be floating or docked to the application frame. A docked tool window may also be auto-hidden. All these terms are described later in this section.
Floating Tool Window
Floating tool window is convenient when you want to maximize the working space used by data visualizers. It may be positioned outside of the main application window, and may even be located on another monitor if you have one. This is contrary to the docked tool window, which may only be located within application window.
The position of the floating tool window may be changed by dragging it by its title with a mouse. You can also use mouse to change the size of the floating tool window by dragging either its frame or one of four corners.
The important thing to have in mind while working with floating tool windows is the keyboard focus. Operating system directs all keyboard input to the window owning keyboard focus. Usually an active title is used to indicate the window that has keyboard focus. Blinking caret may also be used to indicate the focused window. Activating floating tool window by a mouse click always brings a keyboard focus to this window, allowing you to provide input to the window. Clicking outside of the floating tool window usually takes a keyboard focus away from it. To continue sending keyboard input to the tool window, you may need to activate it again.
Docked Tool Window
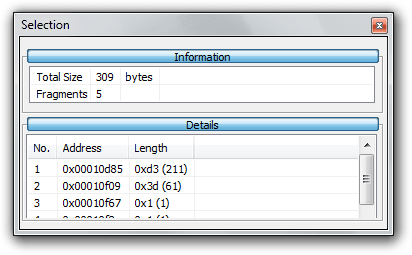
A tool window may also be docked. When docked, it is attached to a tool window frame. A frame may be attached next to another frame or directly to the top, left, right or bottom side of application window. Frames may be located next to each other, inserted one into another and merged. Each frame contains at least one docked tool window and may contain several. Below is a screenshot of a frame with a single tool window docked to the right side of application window:
You can dock any tool window by dragging it by its title bar or tab. During dragging, special placeholders appear on the screen. When you move the mouse pointer over the placeholder, semi-transparent rectangle appears on the screen, indicating an approximate position of the docked window. Releasing the mouse button docks a window in the indicated position.
Side placeholders always appear, allowing you to dock a tool window into a new frame and attach it to the top, left, right or bottom side of the application window.
When you drag a window over a docked frame or over the workspace area, another placeholder appears. It is composed of five boxes: top, left, middle, right and bottom. Dragging a window over the side box docks the window into a new frame, which is attached to the top, left, right or bottom of the frame currently under mouse pointer.
If you drop a window to the middle box, you will dock it into the frame currently under mouse pointer. Dropping a window to the docked window's title also docks it to target window's frame.
You can use mouse to change position of docked windows within a docked frame, as well as drag the window “out of the frame” to make it floating or to dock it into another frame or new frame.
Double-clicking on the docked frame's title makes a frame floating. Double-clicking on the docked window's tab makes only that window floating. Double-clicking on the floating frame's title docks it back to the same location it previously occupied.
All docked frames are separated with each other by splitters. When you position a mouse pointer over such splitter, it changes its shape, telling you that you can drag the splitter to change size of adjoining frames. Splitter position is proportional to the application window size; frames are resized automatically and proportionally when you resize application window.
Auto-Hidden Tool Windows
Any docked tool window frame may be auto-hidden. To auto hide a frame, click the Auto Hide button:
![]()
Four auto-hide bars are located on four application window sides. They are hidden when empty and appear as soon as you add at least one frame to it. When you auto-hide a docked frame, it chooses one of four auto-hide bars, depending on the docked position. That is, if the frame was docked closer to the right side of application window, right auto-hide bar is chosen and so on.
Each docked window's tab in the auto-hidden frame is displayed on the auto-hide bar. Two auto-hidden frames are separated from each other with a slightly larger gap. Dragging mouse over the tab opens corresponding tool window. The tool window smoothly drives out of the auto-hide bar. Click in the tool window to switch keyboard focus to it if you need to provide any keyboard input to the window. The window is automatically closed (quickly drives back into the auto-hide bar) when keyboard focus is lost by the window and mouse cursor is not over it.
Auto hiding tool windows allow you to save the screen space, while still having quick access to functionality provided by the tool windows.
Pressing Auto Hide button again “unhides” the docked frame and returns it to its original docked position.
Tool Window Visibility
Any tool window is always in one of two states: visible or hidden. Visible means the tool window is floating or docked to any of the docked frames or auto-hidden and appears on one of four auto-hide bars. Hidden tool window does not appear anywhere on the screen. Note that a tool window, which is not directly visible by the user, but which tab is visible in one of the docked frame, considered visible by this definition.
Pressing the Close button hides the tool window or entire frame, depending on the “Close affects the current tool window only” setting on the General settings page. To make a previously hidden window visible, select its name in the View menu. This restores the previous position, docked and auto-hidden state of the window and activates it. It also activates the tool window even if it is in visible state, therefore, allows you to quickly move keyboard focus to the tool window, without using mouse.