Configuration Utility
This stand-alone utility provides a visual way to configure Device Monitoring Studio Server. It is basically a visual editor for server configuration file (config.json).
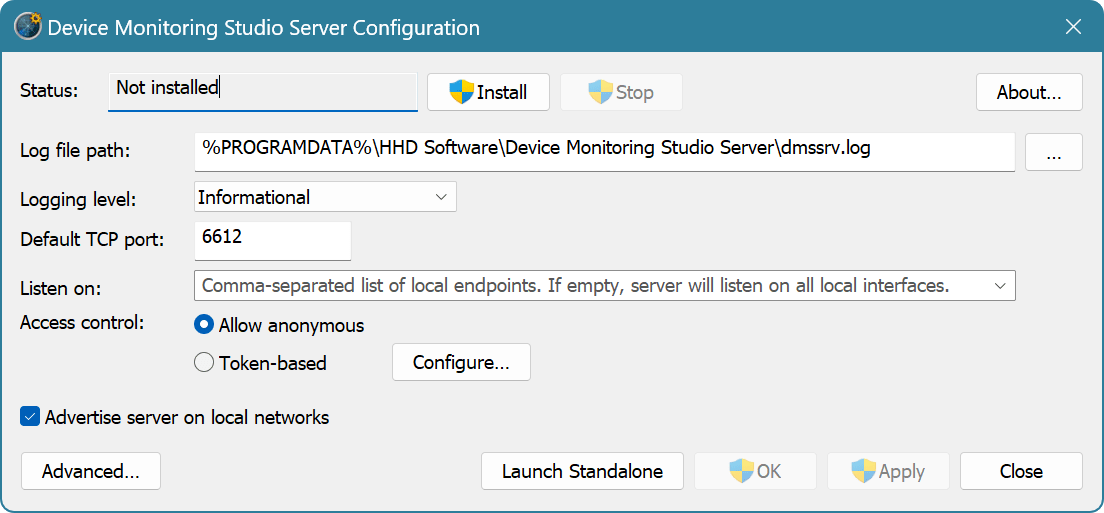
- Status
- This field shows the current status of server if installed as Windows Service.
- Install
- Installs Device Monitoring Studio Server as Windows Service.
- Remove
- Uninstalls Device Monitoring Studio Server as Windows Service.
- Start
- Starts the service.
- Stop
- Stops the service.
- Log file path
- The full path to the log file. Supports environment strings (enclosed in
%). Note that the server will fail to start if it cannot obtain write access to the file. - Logging level
Logging level. Higher level produces more messages and includes all messages from all lower levels. The following logging levels are supported (from lowest to highest):
Level Description Critical Only critical error messages are included Error All error messages are included Warning Warning messages are included Informational Informational messages are included Debug All messages are included - Default TCP port
- The port to use if a given endpoint misses port specification.
- Listen on
A comma-separated list of local endpoints the server listens on. The server supports the following endpoint syntaxes:
hostname- Any local hostname that the server will try to resolve. Must refer to one of the local network adapters.
hostname:port- The same as before, but explicitly specifies TCP port.
ipv4- A local IPv4 address.
ipv4:port- A local IPv4 address and TCP port.
ipv6- A local IPv6 address.
[ipv6]:port- A local IPv6 address and TCP port. Note that IPv6 address must be enclosed in square brackets if it is followed by a port number.
*or empty string- Use all local addresses. This is the default setting.
*:port- Use a specific TCP port on all local addresses.
- Access control
- Select whether server allows anonymous access or requires token-based access.
- Configure…
- Press to configure token-based access control.
- Advertise server on local networks
- If enabled, the server will advertise itself on local networks. Please note that server advertisement is subject to network configuration. If the client does not see a server with advertisement turned on, it still may successfully connect to it using direct address.
- Advanced
- Launches external editor to directly edit
config.jsonfile. - Launch Standalone
- If server is not currently installed as Windows Service and is not running, launches an instance of a server as a standalone process.
Token-Based Access Control Editor
This window is displayed when you press the Configure… button.
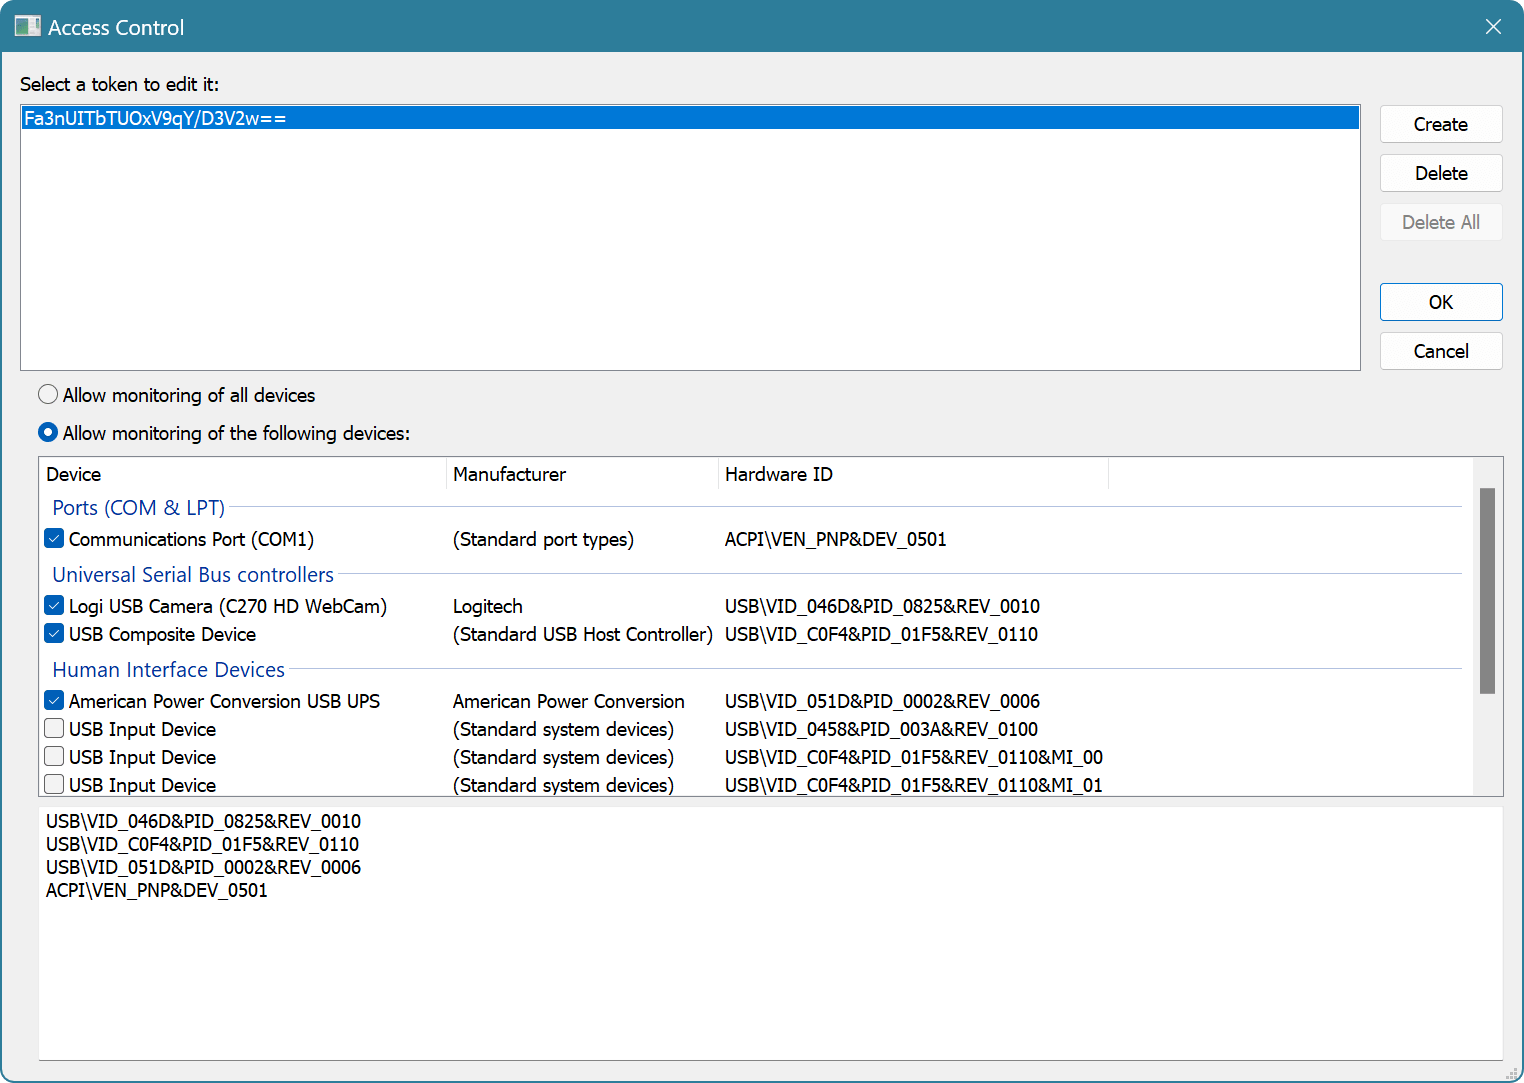
The top part of the window allows you to manage a list of access tokens. Click the Create button to create new access token, Delete button to delete selected token and Delete All button to delete all access tokens.
When token is selected, you can choose if it allows all devices to be monitored or only a subset of server devices. Internally, the allowed device list is configured using device hardware IDs. You can either check corresponding devices in a list or enter hardware IDs manually.